© Pujie.
This section describes the main user interface of the watch element designer. How to undo/redo, how to change the grid and how to zoom and pan the canvas.
The app bar contains all your higher level controls. You can use it to undo any step made, change the grid and more.

You can zoom the canvas using the standard gestures, pinch-to-zoom and double tap. Panning is done by moving the canvas using touch. This is demonstrated in the video below.
To make more space, you can move the layers section downwards. This is demonstrated in the video below.
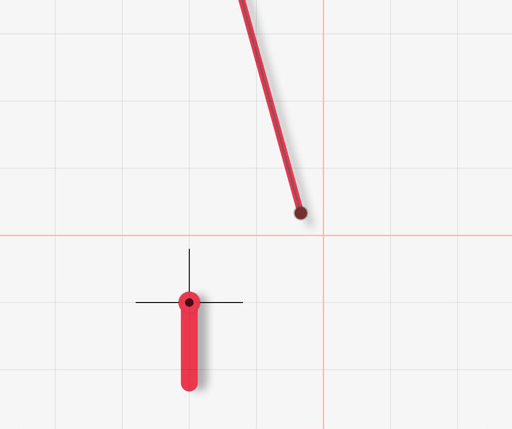
The grid makes it easy to make nice shapes. Using grid snapping you can quickly get your anchor point in the correct position and move layers to an exact position. Use the grid button on the appbar to open the grid dialog
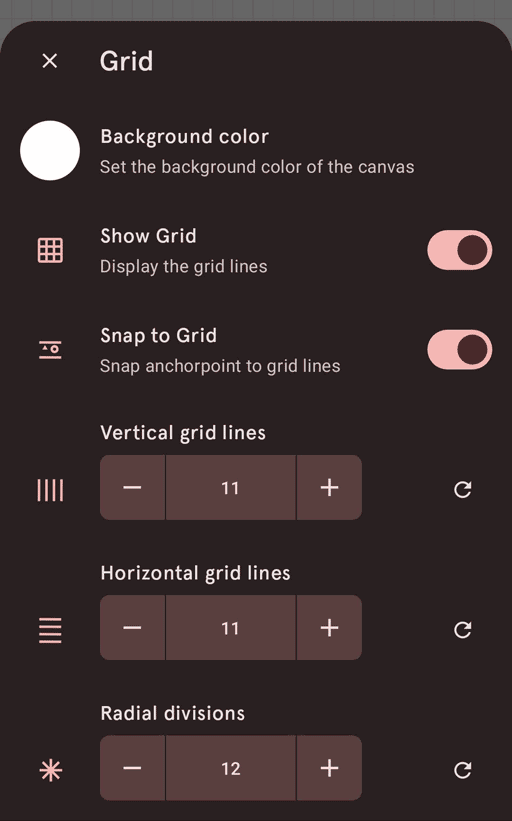
From the dialog, you can choose whether to show the grid and/or snap to the grid. It allows you to change the number of horizontal and vertical gridlines, and the radial divisions (for rotation snapping). You can also adjust the background color.
When grid snapping is turned on, you will see green snap lines when you move your anchor points or your layers. Those lines indicate to which grid lines the point will snap. This is shown in the next image.